3 Keys to Working With Your Contractor

Renovating, constructing or remodeling your home is always a stressful time.  You’re hemorrhaging money, there’s a seemingly endless volley of questions, and you may be living in amongst dust and debris, doing dishes in the bathroom sink. Early on, you absorb these inconveniences as part of the process but as deadlines come and go, It’s easy to let yourself project your frustrations on to the one entity who is responsible for you things not being complete.  Unfortunately, as an Architect, I’ve seen much good will sour between Owner and Contractor during the final weeks of a project when stress levels are greatest. If you take the time up front to follow a few basic rules you can trade stress and anxiety for confidence knowing that things are organized and running smoothly. Honestly, you owe it to yourself considering the staggering amount of money you’ll be investing in your home.  You really should enjoy it as much as you possibly can.

So many outcomes in life are the result of good communication, let’s start there…

1) Open Communication

From the outset of your project clearly define and discuss your expectations for communication.  Set up a pre-construction meeting, preferably at the building site.  Use this time to hand off the final drawing set and specifications, you do have drawings and specifications right?  Setup a meeting schedule and discuss your preferred immediate contact method: email, twitter, cell?  Try to stress that this be reserved for only the most immediate of questions, ones that would hold up progress if they weren’t answered immediately.  You don’t want to be a stumbling block, but equally you can’t be expected to answer the hundreds of potential questions that could arise in day’s work.  On projects where I’m observing the construction process I schedule a weekly meeting which I usually request to be on Wednesdays.  This allows the Contractor time to mobilize on Monday; work through issues on Tuesday and by Wednesday there’s typically a backlog of questions to be answered.  I expect to get sporadic questions throughout the week that are simple to answer and may allow work to progress with minimal time disruption on my part or the Contractor’s, but calls every half hour I strongly discourage.  Establishing this workflow early on enables everyone to be more efficient in accomplishing his or her tasks.

Insist that all communication to and from subcontractors go through the General Contractor, and remember, you must abide by this rule as well.  It’s easy to have a casual conversation with a subcontractor, but never allow this to be confused with supervision or direction.  That is the sole responsibility of the Contractor; it’s not a role you should assume as this often results in costly additions to the project.  This reinforces accountability on the Contractor’s part and ensures nothing gets lost in translation between you and someone on a subcontractor’s crew who has no authority to make decisions or may not understand the financial underpinnings of your project.

2) Well defined, clear expectations

The easiest way to be sure your Contractor is delivering what YOU want and equally what HE thought YOU wanted (and ultimately priced), is to have a set of drawings, schedules and specs.  This doesn’t have to mean spending tens of thousands on an architect, although I think that’s a good investment too and, by the way, one that you can finance inside of your mortgage.  It does mean that you spend more time up front thinking about all aspects of your projects.  Because I know what a daunting part of the process this can be I’ve developed a checklist to help you.  There’s more than you might initially think.  It’s often the reason people feel so overwhelmed during construction, they haven’t ever considered the quantity of materials that go into making a house.  Grout color, cabinet hardware, door knobs, hinges, glass type, paint, flooring, fasteners, insulation, roofing, siding, these are just a few of things to think about.  Remember that your vision of your home has evolved over time, in your headspace, and it’s nearly impossible for your Contractor to completely understand what you were thinking unless it’s translated somehow onto paper.  That’s the easiest way of letting them know exactly what you want.

bunkhouse plans
bunkhouse plans

Plans.  This is where most people start and finish when thinking about building a new home.  “What does the plan look like?”  We’ve all looked at plans before, but have you ever looked at plan and then walked through a house built from that plan?  It’s quite a different experience right?  Plans, diagrams really, monochromatic lines on paper abstractly representing walls, cabinetry, doors, windows, and plumbing fixtures.   While the floor plan remains the most accessible of all drawings there’s so much more to constructing a house than merely drawing and fine-tuning a floor plan. Think of a floor plan as your rhythm section, it sets the beat and establishes order.  But without a lead guitar, rhythm guitar, a bass…what do you have?  The supporting instruments are all of the other documents that describe how the house will look.  You’re probably familiar with elevations too, which are the flattened views of the exterior walls.  There are undoubtedly parts of your living environment that you don’t even notice…take like lights for example you need lights, right, but there’s a huge difference between your vision of the hand-blown Italian glass pendant you’ve always wanted and the recessed can lights your Contractor was thinking you’d want. Look around you and know that your Contractor will do this with every item in your home.  He’ll choose one thing to price and install and if it’s not expressly called out you won’t any recourse but to say, “Thanks…I think?”

Bunkhouse Overview
Bunkhouse Overview

This applies to plumbing fixtures, flooring, and hardware for your doors, every surface, counters, and appliances, even fasteners.  What’s great is that all of these things fit neatly into their own categories in the specifications.  Contractors are trained to look for them and read specifications.  If you hand your Contractor a set of drawings, schedules and specifications, you’ll set yourself apart immediately as an informed consumer.  This nets better pricing, fewer conflicts and a better final product, because it’s directly translates your ideas into something your Contractor can easily understand, price and construct. You’ll sleep better too.

Your specifications or schedules don’t have to be extremely detailed; they can even be as simple as a one-page list.  But, if you don’t have any you risk a huge gulf between your vision (nice finishes, fine detailing, good windows) and your Contractor’s vision (which will be based solely on economy).

3) Minimize changes

Pondhouse Construction

It’s human nature to tweak, revise, rethink, re-imagine and change your mind.  I totally support this, (within reason), I actually encourage it especially during the early design phases.  It’s liberating to let go of preconceptions, old ideas, and embrace fresh thoughts this is the dreaming phase.   When your ideas still only exist on paper the cost to move walls, add baths, make a room 2’ wider is far lower than during construction. Here again, this supports the case for having a set of drawings and schedules and specifications.  You can clearly see how the furniture in your new living room might fit (and here's the key) before the foundation is cast and walls are constructed.  Undoubtedly you'll arrive after the framing is in place and say to yourself, "Wow, this space is different (insert larger/smaller) than I thought it would be..."  This experience inevitably leads to thoughts of redesigning, enlarging, and retooling.  Try to resist this urge.  The scale of buildings changes throughout construction and it's all based on points of reference.  When the foundation has been poured you'll be left thinking you've made a tiny house, no matter the size.  This is because you're comparing it to larger context of the surrounding site, whether it's other structures, forest, or a sweeping mountain view.  After the house is framed, often times rooms look larger than you imagined.  After the house has been sheet-rocked you'll again face this shift in scale...too small.  If you react at each one of these points your new home will now look renovated, your pockets will be empty and your Contractor will probably have another boat.  Changes along the way always cost more.

One more important thing to recognize about changes during construction is that the true cost can often be elusive when the pressure of budgets and construction schedules are in play.  The siding change you made to 'save' money may actually cost you more in the end after the restocking fee (because it was already ordered) and the added labor to install the less expensive siding is factored in.  There are so many variables that go into the building of a house that it's often hard for a Contractor to quantify how cost shifting is to be accounted for in the budget.  The net result?  Nine times out of ten, it's easier for the Contractor to recalculate and levy an up-charge for the simple reason that its costing them more time and effort to re-calibrate the process already set in motion.

Be confident in your design decisions as you follow construction, rely on the planning decisions you made early in the process and most of all...enjoy the process, most of us only build a home once.

Video Review: Decking

A follow-up to my previous post on wood decking. Remember, try and source local materials (within 500 miles) whenever possible.  These products tend to consume fewer resources (less fossil fuels to transport), they support local economies and they're generally better suited to your local climate. A quick call to your local lumberyard should net you current pricing on each of these options. In my experience a ranked list from most affordable to most expensive would look like this:

  • P/Treated Southern Yellow Pine
  • Eastern White STK
  • Atlantic White Cedar
  • Douglas Fir
  • Western Red Cedar
  • Port Orford
  • Redwood
  • Tropical Hardwoods - Ipe, Mahogany, Teak...

Check out Wood, Steel + Glas' site for more information on Atlantic White Cedar, they're a great resource and happily send samples.  As always, I'd love to hear from you with your comments or questions.

Material Review : Wood Decking

DESIGN

Pond house deck

Pond house deck

Most of my projects utilize decks as transition elements between the inside finished floor of the house and the ground level surrounding the house.  While I try to keep the floor as close to the adjacent grade and topography I usually aim for about 1'-0" +/- and depending on the slope of the site in places it may be 1'-6" or more.  Keeping close to the 1'-0" dimension at transition elements allows for a 4" step down to the deck surface and an ~8" step to grade from the deck, which could also utilize a stone step element or other site feature to bridge the gap.  This offset to finished floor from grade also allows for drainage around the house and ensures snow build-up doesn't become a problem. One thing to keep in mind when planning your transition deck elements is to try to keep the top of the deck surface within 30" of the adjacent topography.  Anything higher than this will require a 42" high guardrail or wall by code (and for safety!)

As transition elements, decks can engage the site in a way the house can't.  If they're freestanding and not connected to the house (which I recommend whenever possible) they can be set at almost any height without the same concerns one has with setting the building floor too low.  Keeping decks as separate elements has the added benefit of not puncturing holes in the siding or foundation or all the worry of flashing details.

Generally, I prefer to keep decks as simple as possible: regular, rectangular forms, no chamfered corners or multi-level every-trick-in-the-bag affairs.  Regularized, rectangular forms accommodate seating groups well and they make economical use of framing materials.  The key to integrating your deck into the architecture of your home is to reference the interior and exterior spaces with the geometry of the deck.  Try to wrap these elements around a building corner which engages the architecture and feels deliberate.

Try to connect interior and exterior floor planes with decks, generally large glazed exterior walls are natural locations to connect interior and exterior spaces.  My advice with any design element is to make the gesture large, singular and with purpose. Note how the Pond House deck is a long singular gesture, almost wharf-like.   It follows the geometry of the house, wraps the corner and connects the interior and exterior spaces.  It transitions from land to water and while it's more than 30" above the adjacent topography the cable rail guard virtually disappears.

MATERIALS

There general categories of natural wood decking are: Pressure treated lumber, Cedars + Redwood, and Tropical Hardwoods.  Let's start with the most common of all decking materials...

Pressure treated wood

PT, the colloquial term, is made from Southern Yellow Pine and is soaked in chemicals under pressure to preserve it, this lends a green tint to the fresh wood, which over time weathers to a muddy brown. The chemical formulations used to treat wood have changed over time as manufacturers discover which ones are carcinogens and choose a new 'greener' formula. Beyond the toxic nature of the preservatives in PT wood, pine is generally considererd dimensionally unstable and is prone to warping and cracking...doesn't sound great if it's a surface you or your children will walk on with bare feet, right? Many people choose PT wood because it's inexpensive and readily available in all of the big box stores, but I would urge you, if you're able, to steer away from this as an option even if it means making your deck smaller and use one of the following materials.

Cedars + Redwood

wood decking various types

wood decking various types

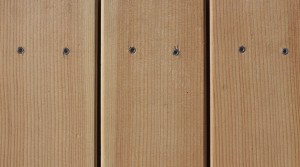
These woods are naturally rot and decay resistant, their resins and tannins protect them even without finish and they weather to a soft, silvery gray if left untreated (which I recommend).  These woods have the added benefit of being easy to cut and fasten, they're lightweight and they look very tailored. Because they're softwoods they will dent and scratch with time but equally they're soft underfoot.  Typically these woods are graded by appearance, clearer grades being more expensive.  Buy the best grade you can afford, and each lumberyard has different terminology related to each grade.  Do be afraid to ask and look at their stock, they're there to help.  A vertical grain board will be more dimensionally stable and look better than a plainsawn board. The Western Red Cedar Association has an excellent guide to selecting cedar for decking, you can find it here.

Here at 30X40 Design Workshop I try to use local products whenever possible.  Local is generally accepted to mean any location within 500 miles, which ensures that the product has low embodied energy (the total energy cost associated with getting the product to market) and doesn't negate the 'green' aspect of choosing a natural product in the first place.  The local products I have access to are Eastern White Cedar STK 1x6 decking and Atlantic White Cedar decking.  The Eastern White Cedars are known for being knotty but the STK grade assures you receive only small tight knots.  This also limits the board lengths to about 8', which is totally workable with both 16" + 24" framing modules that you'll be fastening the decking to.  I've used Western Red Cedar and Port Orford Cedar in quite a few projects and while neither material is local, I still prefer them to pressure treated.  If you request FSC certified wood you can be assured you'll receive wood that was sustainably harvested.

Douglas Fir Decking

Douglas Fir Decking

Another softwood that bears mentioning is Douglas Fir.  It will typically be less expensive than Western Red, Port Orford, and the Atlantic White, but with similar characteristics.  Fir doesn't have the same rot resistance as the cedars, but it looks great and if you're able to finish it with a penetrating oil sealer it will last.  It has the added benefit of being slightly harder than redwood and cedar.  Use this if you've used fir in other areas of your project, it can help tie things together.

Tropical Hardwoods

These woods are even more durable and rot resistant than the Cedars + Redwoods.  However, they have two downsides that I would consider fairly substantial.  First, harvesting practices of tropical hardwoods are extremely variable and, because they often come from developing nations, are often environmentally devastating.  The embodied energy of these materials is subsequently very high, traveling from rainforest by truck > rail > port > port > rail > truck > lumberyard, not to mention the carbon sink you remove from clearing rainforest. Secondly, because the materials are so dense they're difficult to work with, they dull tools and require pre-drilling of holes prior to fastening.  There are too may species to mention by name, but you've probably heard of some of the most popular, Mahogany, Teak, and the very popular Ipe (say: ee-pay) or Ironwood.  True to its name Ipe is solid, strong and looks beautiful.  It weathers to a soft gray and can be brought back to its original color by lightly power-washing.  Again, I've used this material on projects (Pond House above) and can attest to its durability, strength and beauty, but it comes at a cost...both environmental and financial. Request FSC certified if your conscience suggests it and while you'll pay more for the chain of custody certification you'll know while sipping your G&T on your deck that you didn't clear cut a developing nation to make it possible.

Size/Thickness

Most decking I use is 5/4x6  (the actual dimensions are 1"x5 1/2", as they surface the boards removing 1/4" of total thickness and 1/2" of width).  Not all projects call for this size, but generally wider boards=lower labor costs to install and fewer fasteners.  Each material can be sourced in differing widths or even set on their sides down to about 2" in width.  With the softwoods you won't want to go less than 5/4 thickness as the material can feel spongy underfoot...remember it's a softwood.  The 4" wide boards can look very boat-like and tailored sI have a soft spot for that look.

Fasteners

Ipe square drive screws

Ipe square drive screws

I prefer stainless steel screws.  They hold well, they don't require pre drilling (on most woods), they allow you to pull boards for replacement at any time and I think they look great.  Choose your head pattern...personally, I prefer the square drive but many contractors don't like how easy the screws can strip.  Star drive heads don't look as nice but they install quite easily and the added torque resistance keeps them from stripping.  Many of the tropical hardwoods will require pre drilling with a countersink bit to keep the head below the surface level.  Some contractors swear by ring shank stainless steel nails...those work too, good holding power, but around softwoods think about flying hammers and dented wood.  Not my favorite...and the drive depth can vary which can mean you're feeling the nail heads under foot.

Finishing

Don't.  Seriously, let the wood weather naturally...you have other things to maintain don't you?  Choose a wood that silvers and resists rot and decay and you'll be able to relax and enjoy your deck rather than washing, sanding, and sealing.  If you like tedious work or want to preserve the color of your new wood, choose a penetrating oil rather than a film forming protective coating.  Penetrating oils mimic the natural oils in products like cedar and help keep it from warping and cracking while letting the wood breathe and dry after wetting.  Beware, this is an ongoing chore and if you neglect it you'll work even harder to get the new wood look back.

What about plastic decking?

Esthetically, if you care at all how your deck looks or you want to brag about what good taste you have...please don't use plastic decking.  I always argue for the natural over the synthetic and this is a case where some of the materials in these products (like PVC) are harmful to people and the environment.  They may outlast you and require very little maintenance, but in my opinion they're truly a strange beast.  They imitate everything about the natural product you'll wish you'd bought, wood graining, coloration, and size.  Save the plastic for your drain pipes.

Do you have a favorite material I've left out?  I'd love to hear from you...meanwhile, I'm planning to post a price comparison for some of the products I specify regularly.

Hello...

In case we haven't met, I'm Eric. Among other things, I'm an architect, an avid mountain hiker and biker, a proud father of two, a husband, guitar player, documentary film fan, a home brewer and New Yorker. For now, I consider myself a Mainer, (although locals would disagree) living just off the coast of Maine on a rather large island, Mount Desert Island, home to Acadia National Park.

Please pardon all of the white space as I'm preparing material for my new blog entitled '30x40'.  I've moved on from the Longhouse blog, started back in 2006/2007 to chronicle the construction of our home. Although I no longer publish posts there, it continues to serve as an online resource documenting the process of an architect creating a modest home on a tight budget.

My plans for this new space are still taking shape. Part of this project is to seek out new opportunities for collaboration, forge new connections to a wider world and to fulfill a promise to myself to continue to reinvent life and remain creatively challenged.  I owe many thanks to Pat Flynn, Chris Guillebeau and Tim Ferriss for the inspiration to commit and do something.  I'm equal parts excited and apprehensive...I'd be honored if you'd stay tuned...